Navigation & Controls
The pi-Stomp v3 can be controlled entirely from the device: no computer needed once your pedalboards are set up. Simply use the Navigation encoder, the footswitches, and the tweak encoders.
v2 has up to 5 footswitches and 1 encoder (the Navigation encoder). The tweak encoders and the long-press snapshot shortcuts in this page are v3-specific — on v2, footswitches A–E map to MIDI CCs 60–64 and the encoder is navigation only. See Configuration for how footswitch assignments differ.
The LCD screen
The home screen shows the current pedalboard, active snapshot, and all plugins in the chain.
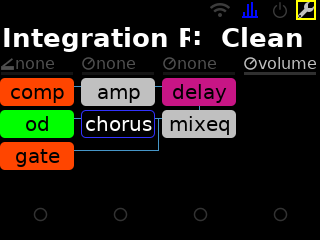
- Pedalboard name (top) — click to open the pedalboard menu
- Snapshot name (below pedalboard) — click to open the snapshot menu
- Plugin tiles — each block represents a plugin in the chain. Filled = enabled, unfilled = bypassed
- Toolbar icons (top right) — Wi-Fi status, audio settings, bypass, system menu
Navigation encoder
The leftmost encoder is the primary interface to the LCD. Three gestures cover every screen, including ones this page doesn't document.
| Gesture | What it does |
|---|---|
| Turn | Moves the yellow highlight across the toolbar icons, pedalboard name, snapshot name, and plugin tiles |
| Click | Acts on what's highlighted — opens the pedalboard or snapshot list, toggles a plugin's bypass, toggles global bypass, opens the system menu from the wrench icon |
| Long press | Goes one level deeper, or exits. On a plugin tile it opens deep edit; on the home screen it opens the system menu |
A long press fires at 0.5 seconds while the control is still held down, and it suppresses the click that would otherwise follow on release. This applies to the footswitches too: stomp slowly and you get the long-press action — a snapshot change — instead of the toggle you wanted.
The sections below walk through each of these in turn.
Selecting a pedalboard
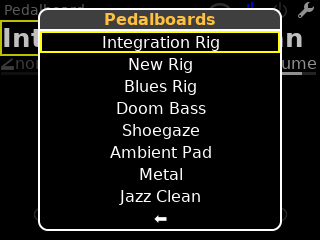
- Rotate the Navigation encoder until the pedalboard name is highlighted (yellow)
- Click to open the pedalboard menu
- Rotate to scroll through available pedalboards
- Click a pedalboard to load it
Loading a new pedalboard takes a few seconds, during which time audio can drop momentarily.
Selecting a snapshot
A snapshot stores every plugin parameter on the pedalboard — same plugins and wiring, different knob positions. See Product Overview for the term, and MOD-UI for how to create one.
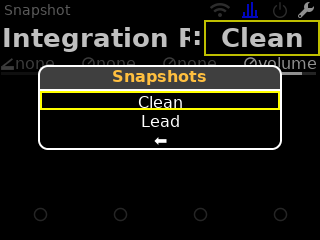
- Rotate the Navigation encoder until the snapshot name is highlighted
- Click to enter snapshot selection mode
- Rotate to scroll through available snapshots
- Click to load the selected snapshot
You can also switch snapshots by long-pressing footswitches A and B (previous and next).
Bypassing and enabling plugins
- Rotate the Navigation encoder until a plugin tile is highlighted (yellow border)
- Click to toggle between enabled and bypassed
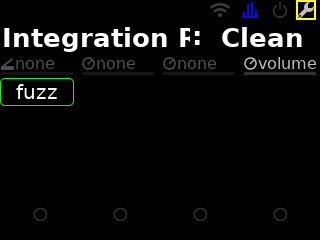
Plugins assigned to footswitches can also be toggled from the floor, and the footswitch label on the LCD follows the current state.
Editing plugin parameters
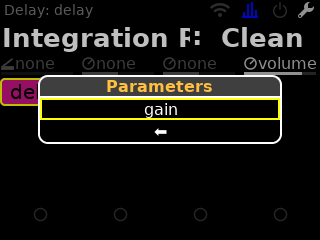
- Highlight a plugin tile and long-press the Navigation encoder to open its parameter list
- Rotate to select a parameter, then click to open it
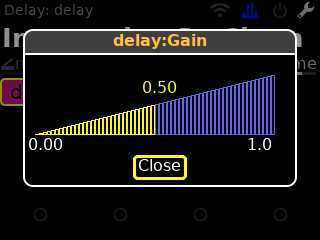
- Rotate to adjust the value — changes take effect immediately, so you can set it by ear
- Click to close the dialog
Footswitches
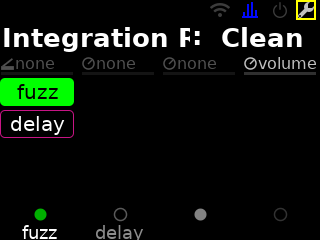
The four footswitches (A–D, left to right) are user-configurable via MIDI CC. Default behaviour — click toggles a plugin bypass, long-press moves between snapshots or opens the tuner/tap tempo — is in the default CC map. See Configuration to change it.
When a footswitch is assigned to a plugin, its label and color appear on the LCD:
Tweak encoders
Tweak 1 and Tweak 2 send MIDI CC messages (default 70 and 71 — see the default CC map) and can be assigned to any plugin parameter via MOD-UI. Long-pressing them also changes snapshots by default — Tweak 1 previous, Tweak 2 next. The Volume encoder (Tweak 3) adjusts the master output level.
Global bypass
The bypass toolbar button (power icon) toggles audio processing on and off. When the icon is green, processing is active. When grey, the signal passes through unprocessed.
Click the button to toggle. Long-press to change which channels are bypassed — most users will prefer Left & Right bypass.
Tap tempo
Long-press footswitch D to enter tap tempo mode. The footswitch label changes to show the current BPM. The tempo is set from the second tap onward; keep tapping (it averages up to three intervals) to home in on a steady value. Leave more than 1.5 seconds between taps and the samples are discarded as stale, which also puts the floor at 40 BPM. Long-press again to return to normal mode.
To save the tempo for a pedalboard: System Menu → Pedalboard Management → Save current pedalboard.
Few plugins read the host tempo. Bollie Delay does, but only with its Tempo Mode set to MOD/Host — at any other setting it ignores your taps and nothing appears to happen.
Notes panel
v3.2.0 adds a notes panel for pedalboard and plugin annotations. Notes appear with a ✎ prefix on the pedalboard grid. Access them from the system menu or plugin long-press menu.
System menu
Navigate to the wrench icon in the toolbar and click to open the system menu.
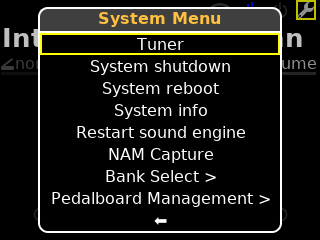
From here you can manage pedalboards, configure Wi-Fi, adjust audio settings, and access system utilities.
Tuner
From the system menu, select Tuner. You can also open and close the tuner by long-pressing footswitch C.
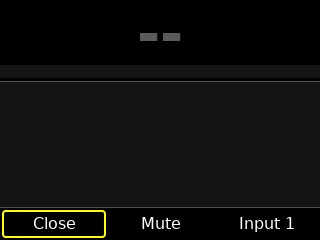
Play a string and the tuner shows the note and a visual indicator.
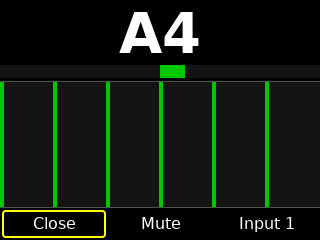
Use the navigation encoder to toggle mute while tuning, if desired.